|
|
![]()
There are six main menus in BUDSIR for Windows:
| 1. The BUDSIR menu | 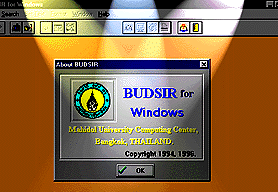 |
4. The Set Text menu |
| 2. The Search menu | 5. The Format menu | |
| 2. The Window menu | 6. The Help menu |
The BUDSIR menu, shown in Figure 2, is used to open books, select collections of scriptures, print, select printers, and to quit the program.
2.1.1 Open
You use this command to open the volume you wish to look at. You can also do this by pressing the hot-keys [Ctrl] - [O] or by clicking on the icon
on the toolbar. Once this command has been selected, a list of volumes to choose from will appear on the screen. Only volumes from the set of scriptures selected in the Select Collection command will appear.
2.1.2 Select collection
You may choose to open or search from one of two collections of scriptures, the Tipitaka collection or the Atthakatha and Tika collection, at any time simply by clicking the mouse button on the collection desired as shown in Figure 2.
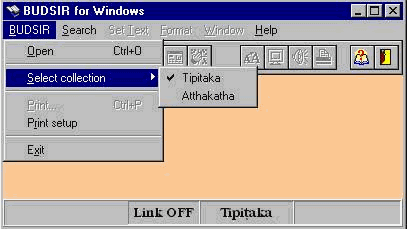
Figure 2: Choosing the Select Collection command
2.1.2 Print ...
The Print command, the hot-keys [Ctrl] - [P], or the icon
on the toolbar are all for activating the Print command. You must specify the page to be printed as in Figure 4.
Figure 4: The Print dialog box
2.1.4 Print setup
The Print Setup command is for choosing the kind of printer, the kind and size of paper and the orientation of printing (i.e., portrait or landscape). BUDSIR IV for Windows can be used with three kinds of printers:
1. 9-pin or 24 pin dot-matrix printers
2. Ink-jet printers
2. Laser jet printers
When the Print Setup command is chosen the dialog box shown in Figure 5 will appear. This dialog box can also be accessed by clicking the
button the Print dialog box (Figure 4).
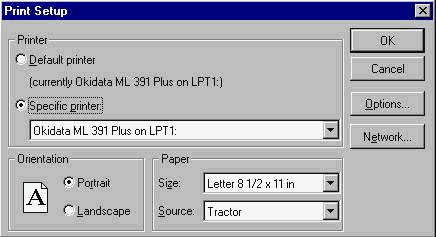
Figure 5: The Print Setup dialog box
You may use the printer currently in use by choosing the “Specific printer” option, clicking on the arrow
2.1.5 Exit
When you have finished using BUDSIR IV for Windows you must choose this command or click on the
icon on the toolbar before closing down your computer. When this command is chosen a dialog box will appear asking you to confirm that you wish to quit the program, as in Figure 6.
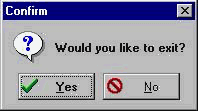
Figure 6: The Quit dialog box
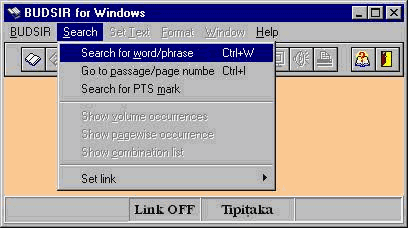
The Search menu is the menu you will be using most often, as this is the menu that contains all the commands for searching. It contains the commands shown in Figure 7.
Figure 7: Commands on the Search menu
Words or phrases to be searched for can be written in one of four ways:
- By word: for instance, if you type the word atammayatam the program will search all volumes in the collection for all occurrences of the word “atammayatam”.
- By partial-word: if you type atamm* or *tammayatam or *tammay* the program will search for all words that contain these letters, resulting in a list of words. From this list, you may choose one word to search for the volume/passage/pages in which this word appears. For instance:
atamm* instructs the program to search for and display all words that begin with “atamm”.
*tammayatam instructs the program to search for and display all words that end in “tammayatam”.
*tammay* instructs the program to search for and display all words that contain “tammay” in between other letters.
- By phrase: if you type “attanamupamam katva” the program will search for all occurrences of that phrase and display the volumes it occurs in.
- By partial phrase: if you type a phrase with partial words, such as atta* upamam katva, atta* upam* katva or atta* upam* kat*, the program will search for all phrases that contain these words or parts of words and display the words that it finds, which can then be selected for searching.
2.2.1 Search for word/phrase
This command is used for searching for words or phrases or partial words or phrases in the Tipitaka or the Atthakatha. You can activate this command by choosing the command “Search for word/phrase” from the Search menu, by using the hot-keys [Ctrl] - [W] or by clicking on the
icon on the toolbar.
2.2.2 Go to passage/page number
You can choose to look at text in specific volumes, pages or passages in the Tipitaka or Atthakatha by choosing the “Go to passage/page number” command, pressing [Ctrl] - [I] or clicking on the
icon on the toolbar.
2.2.2 Show volume occurrences list
When the program has found the requested words or phrases, a list of all volumes in the Tipitaka or Atthakatha in which the word/phrase occurs will appear (Figure 8). From this list you can choose a volume to look at the relevant passages.
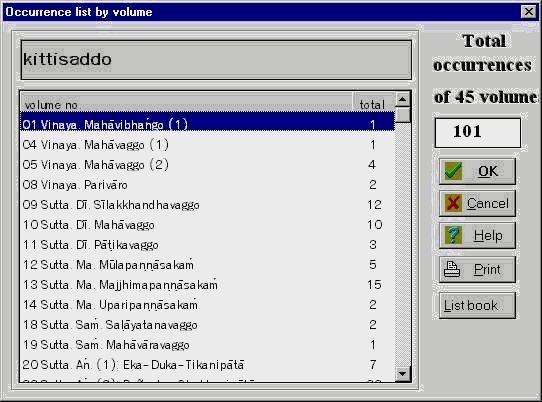
Figure 8: The list of occurrences by volume dialog box
Once you have chosen a volume from the list and looked at its contents, you can go back to look at the list (Figure 8) by using the “Show volume occurrences list” command on the Search menu.
2.2.4 Show pagewise occurrences list
Once you have chosen a volume from the list, the program will show a list of pages in that volume on which the word/phrase occurs, as shown in Figure 9, so that you can choose a page for viewing.

Figure 9: Occurrences by page dialog box
You can view the list of occurrences by page at any time by choosing the “Show page-wise occurrences list” command on the Search menu.
2.2.5 Show combination list
In the event that you make a search using wild card “*” characters, the program will first show a list of all possible words, from which you may choose one for searching. After searching for one of these words, you can go back and look at the list of all possible words for further searching by choosing the “Show combination list” command on the Search menu, thus saving the time and trouble of having to type the desired word again. Figure 10 shows an example of a combination list from a wild card search.
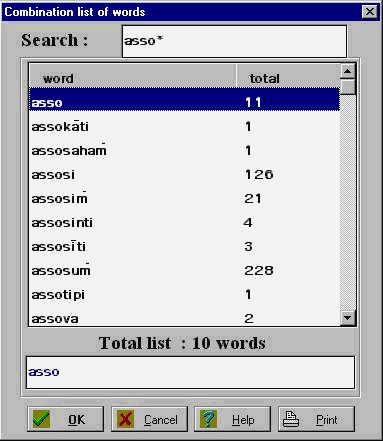
Figure 10: A combination list of words found in a “wild card” search
2.2.6 Set link
The Tipitaka and Atthakatha, as shown in the Appendices, are two sets of scriptures that are interrelated. You may choose to have an automatic link set up between the Tipitaka and Atthakatha and vice versa to have a search extended to both collections of scriptures. The program will display the link status on the lower bar of the window, as shown in Figure 11.
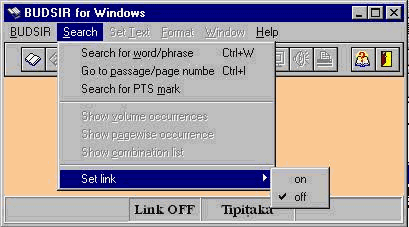
Figure 11: The set link command and status bar
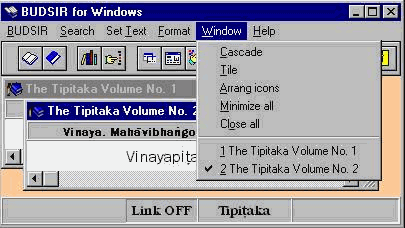
2.2 The Window menu
As shown in Figure 12, the Window menu contains the commands used for arranging windows on the screen and for choosing from among the windows already open. The first two commands, Cascade and Tile, control the way windows appear on the screen.
Figure 12: Commands on the Windows menu
2.2.1 Cascade
By choosing the “Cascade” command or clicking on the
icon on the toolbar you can have the program arrange all open windows diagonally downwards from left to right, as shown in Figure 12.
Figure 12: Windows arranged in “cascade” style
2.2.2 Tile
By choosing the “Tile” command or clicking on the
icon on the toolbar you can have the program arrange all open windows equally end-to-end, from top to bottom, as shown in Figure 14.
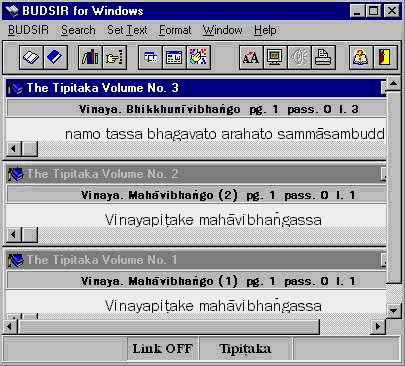
Figure 14: Windows arranged in “tile” style
2.2.2 Arrange icons
By choosing the “Arrange icons” command or clicking on the
icon on the toolbar you can have the program arrange icons of file windows minimized within the window.
2.2.4 Minimize all
This command temporarily shrinks all open windows into icons and arranges them from left to right, as shown in Figure 15.
Figure 15: Windows that have been minimized to icons
2.2.5 Close all
This command closes all open files.
As shown in Figure 16, the Set Text menu is used for selecting text for speech rendition or copying to the clipboard.
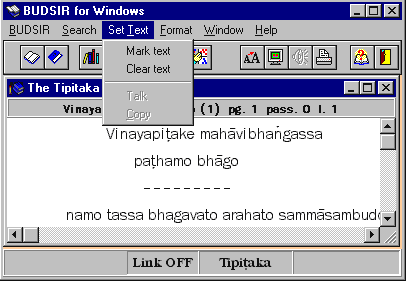
Figure 16: Commands on the Set Text menu
2.4.1 Mark text
When you want to hear a passage read out or copy it you must first select the amount of text. This is done by choosing the “Mark text” command, moving the mouse pointer to the position at the first part of text to be selected and “dragging” the pointer (holding down the mouse button all the while) to the last part of text desired, then letting go of the mouse button. The text marked will appear highlighted, as shown in Figure 17.
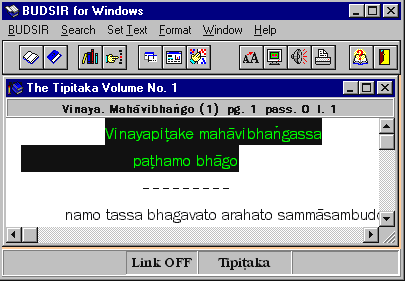
Figure 17: Selected text
2.4.2 Clear text
This command “de-selects” highlighted text.
2.4.2 Talk
BUDSIR IV for Windows can give audio read-outs of selected passages of Pali text in the Tipitaka or Atthakatha. To do this you must first select the text then choose the “Talk” command or click the
icon on the Toolbar. The program will give an audio read-out of the highlighted text.
2.4.4 Copy
Highlighted text can also be copied to the clipboard for use in other programs by using the “copy” command.
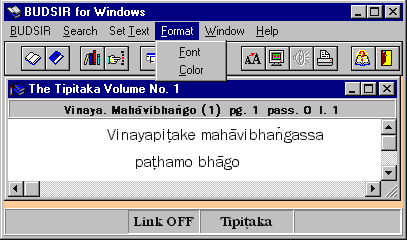
This menu contains commands for specifying the way the program appears on the screen, which can be changed to suit the user’s preferences. It contains the following commands:
Figure 18: Commands on the Format menu
2.5.1 Font
By choosing the “Font ...” command or clicking on the
icon on the Toolbar you can change the style and size of text by using the mouse to choose the specifications you want. Text so formatted will change only in the volume currently open. Figure 19 shows the dialog box for choosing font styles and sizes.
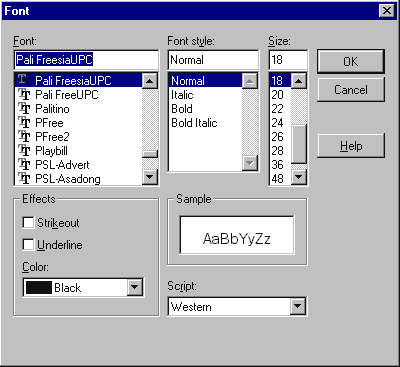
Figure 19: The dialog box for selecting font preferences
2.5.2 Color
By choosing the “Color...” command or clicking on the
icon on the toolbar you can change the background color used for windows to improve their appearance. The program displays a pallet of colors to choose from like the one shown in Figure 20.
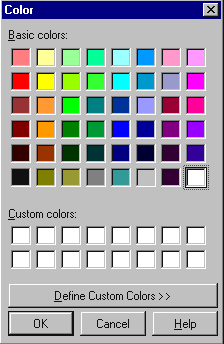
Figure 20: The Color dialog box
This menu gives advice on using the program.
Figure 21: Commands on the Help menu
2.6.1 Contents
By choosing the Contents command or function key [F1] you can read descriptions of the functions of the various commands and toolbar icons used in the program.
2.6.2 Topic search
This command initiates a search for explanations on specified topics.
2.6.2 About
When the About command is chosen or the
icon on the toolbar is clicked a screen will appear giving the name of the program, its version number and the names of the developers on the team that made the program.
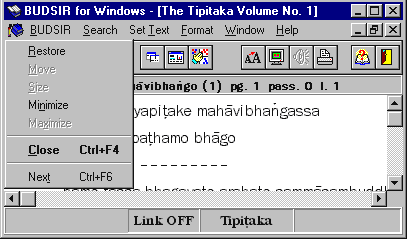
2.7 Using other icons
is used to close an opened volume. The program will close texts one volume at a time. This can also be done by clicking on the control menu box icon (
) shown in Figure 22, then choosing the Close command, or by double-clicking on the control menu box icon
icon, or by pressing [Ctrl] - [F4].
Figure 22: The commands on the control menu box
Copyright © 2002 Mahidol
University All rights reserved. |